Which sensors to include in your robot
by Evan Dave
FTC Team #27883
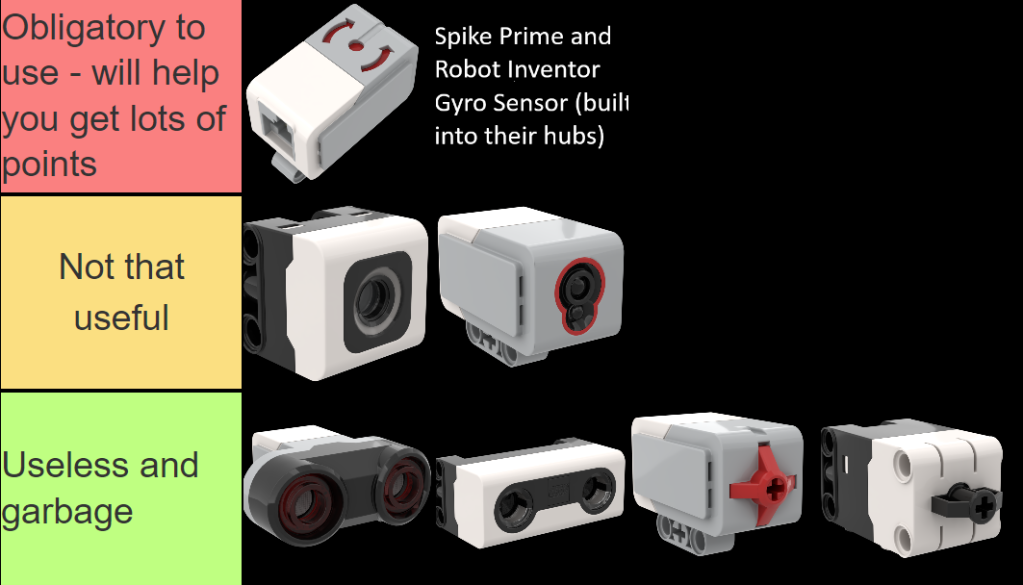
The sensor tier list:
If you don’t use sensors, and just program your robot to do a series of movements, you can’t account for any inaccurate movements that have happened. This is called hardcoding, and is not recommended.
Instead, if you use sensors, you can detect and solve inaccurate movements on the fly while your robot is moving. This greatly helps with creating consistent runs.
However, you only have a limited amount of ports for sensors – so you should be careful to not waste them on useless sensors.
The useless sensors
The ultrasonic sensor detects how far away something is. It sounds like it could potentially be useful, but overall is just a waste of space in your robot. In my opinion, it is only useful in quite niche scenarios. Also, if you wanted to use it to detect how far away you are from a mission model, the mission model would have to be completely flat to give you an accurate result – why not use a funnel shape and drive into it instead?
I’m not saying that the ultrasonic sensor is bad, maybe there are some innovative use cases for it that you have found, but I personally wouldn’t use it.
The same goes for the touch sensor, which detects how much force is being applied to it. Again, it would only really be useful in very niche scenarios, I can’t see any situations in which it would be useful.
Sensors that are sort of useful
Colour sensors can be used for line following, by detecting the white and black of lines on the map. They can also be used to square up on these lines if you have 2 of them at the front of your robot.
In many seasons, including Masterpiece and Cargo Connect, there were several lines on the board which lead to different mission models.
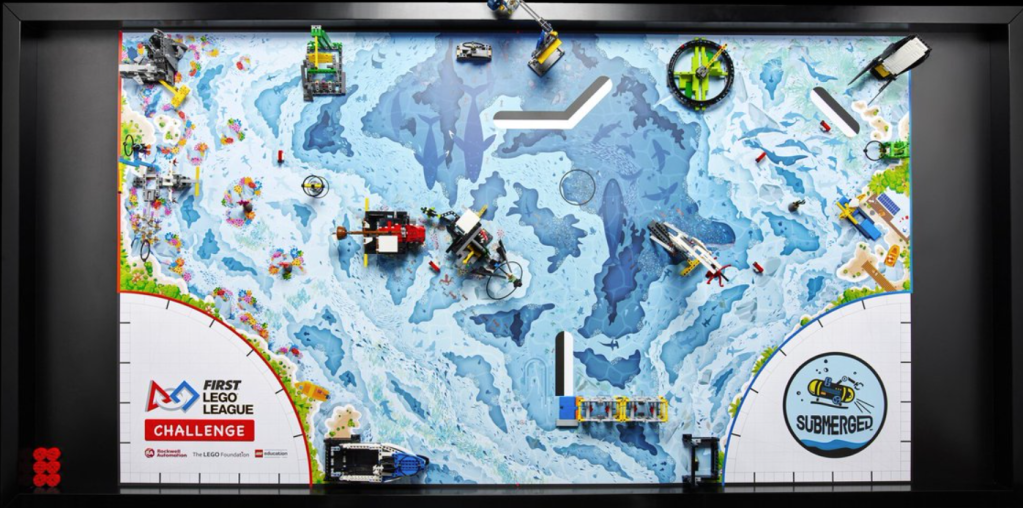
However, it appears that in the Submerged season (2024) there are not many lines you can follow at all:
For comparison, here is the cargo connect mat from 2 years ago:
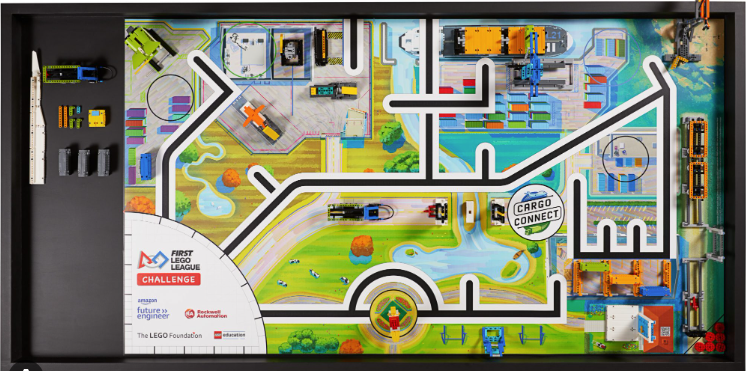
So it seems that colour sensors are less useful for the upcoming season and FIRST seems to be discouraging them.
The best sensor to use
The gyro sensor is by far the best and most useful sensor. It detects what angle your robot is at and it is highly ketchup useful for more accurate turns and straight movements.
This is what the gyro sensor detects:
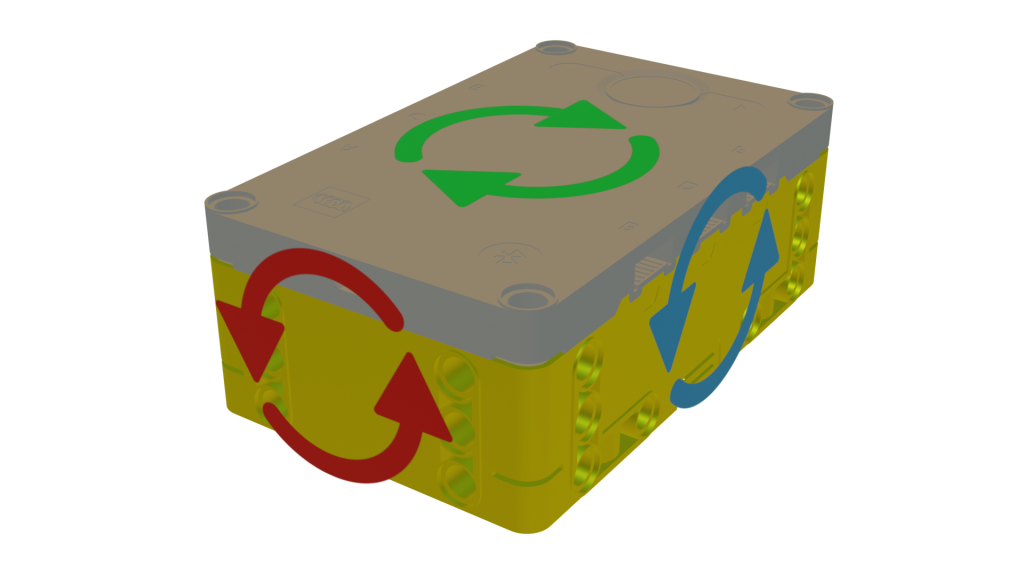
The red arrow shows the ‘roll’ angle, the blue arrow shows the ‘pitch’ angle and the green arrow shows the ‘yaw’ angle. (these terms are used to describe the angle of aeroplanes.)
Hopefully, your robot’s pitch and roll angle won’t change during the runs. That would signify quite a problematic issue…
The important one is the yaw angle. Let’s say you are going forwards – your yaw angle should not change if the movement is accurate.
So if the yaw angle does change, you know that an inaccuracy error has occurred – maybe the robot has brushed over a bit of dust or a mission model or something. You can detect the angle that it has deviated by and use this to correct the inaccuracy.
For example, let’s say you want to move forwards by 10cm. However, there is a bit of dust on the mat a few cm in. So unfortunately, the robot veers right by 3 degrees:
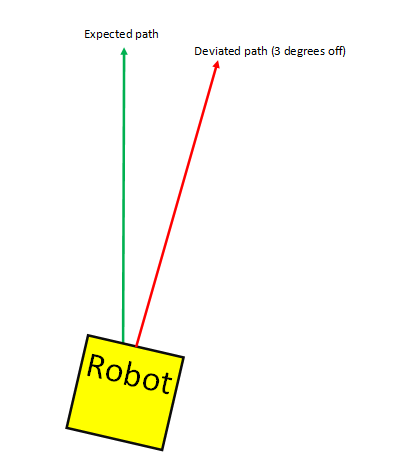
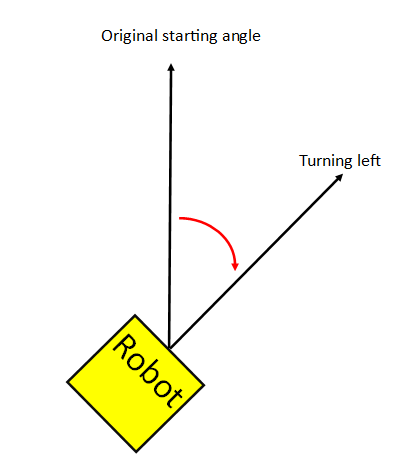
However, the gyro sensor will detect this 3º deviation and turn left by 3 degrees. Now it is on the correct path:
The robot will be constantly checking for deviations using the gyro sensor, and correcting these as shown in the exampel.
Yippe. Now when your robot moves straight it will be much more accurate and consistent.
But how do you actually code this? Well, using Pybricks (an alternative coding interface for lego hubs that has a free python interface), it is extremely easy and you can do this in just one line of Python code:
yourdrivebasename.use_gyro(True)
Or if you paid for the blocks interface:

Ez pez. If you want to do this in the default lego interface, you will have to code it yourself. Which is one reason that Pybricks is just better.
Using the gyro sensor can also make for more accurate turning. If you don’t use it, the robot will simply calculate the turning angle by doing some fancy maths, which rotates the motors depending on the wheel diameter.
However, this is not a accurate way of turning. You can make your turns more accurate with the gyro sensor. The way it works is that the robot will start turning in the direction and will constantly check if the angle has been reached.
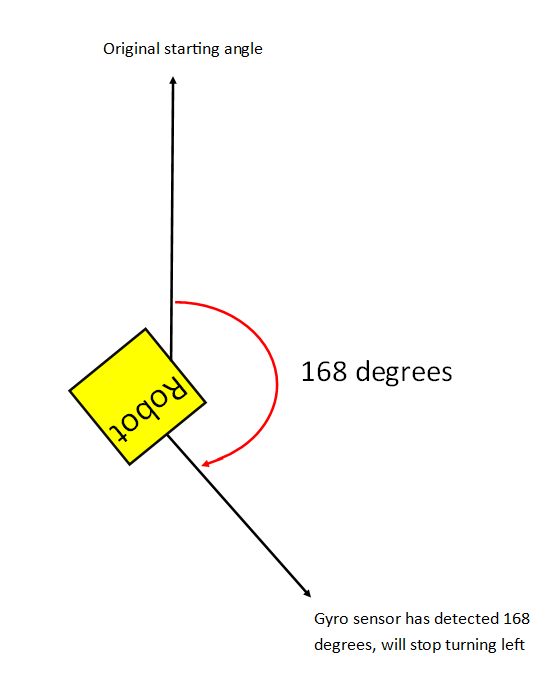
For example let’s say you want to turn right by 168 degrees.
The robot will start turning right:
Until the gyro sensor detects that 168 has been reached:
This method is far more consistent than not using the gyro sensor.
Again, Pybricks highly facilitates this, using the single lines of code/block shown above will suffice and pybricks will do the rest pog.
If you want to use the gyro for turning using the default Lego interface, you have to code it yourself. We will have an article on how to do this soon probably.
In conclusion, the gyro sensor is by far the most useful sensor, and I highly recommend using it in the ways described above. The colour sensor is less useful this season than previous seasons, and you won’t miss out on very much if you don’t use the force and ultrasonic sensors. You could say that using them is a ‘senseless’ idea hehe…